CLOTH DIAPER 101
There are a ton of options out there when it comes to cloth diapers, but here is how we do it in the Rapp house. I hope this info makes it easier for you to make the best decision for your little one.
I promise you it's not gross or hard or time consuming and you will not be spending every free minute doing laundry. In my experience it's been super easy...and i've become a little obsessed with cloth diapers (as many cloth diapering parents do...).
So you're pregnant and considering cloth diapers?!! CONGRATULATIONS!!
What you'll have to do before the baby arrives: Buy some diapers.
What you need to decide is whether you want to do a prefold cloth with a cover OR a more modern diaper like a pocket diaper or all in one. I decided to go exclusively with one-size pocket diapers because the One-Size means they adjust sizing through out your babies diapering years so you don't have to buy a bunch of different size diapers and switch them out as baby grows (like you have to with their clothes). And the Pocket Diaper means you can stuff them as you wish depending on whether your baby is a heavy wetter or not. (**special thanks to Carey Ogden who helped me with this decision when I was pregnant)
Although the pocket diapers say they fit 7-35lbs, I found that they leaked until Owen reached 10lbs, so we were in pre-folds and covers for the first few weeks (as well as some of the disposables they provided at the hospital (definitely shove all those free diapers, wipes, etc into your bag before you leave the hospital!!))
What I purchased while I was pregnant:
-2 six packs of OsoCozy prefolds in size 1
-package of Snappi fasteners (so the prefolds hold in place)
-3 Thirsties newborn diaper covers (with the belly button notch)
-12 Bumgenius 4.0 One-size pocket diapers (some hook and loop some snaps)
-6 Fuzzybunz One size diapers (plus 3 more after Owen was born)
-2 wet bags (you'll need this for your travel diaper bag to transport a soiled diaper back home)
-Ubbi diaper pail
-2 Ubbi pail cloth liners (they get thrown into the laundry along with the diapers)
**you'll have to prep the diapers before they can be used. This means washing them 3-4 times so they become really absorbent. make sure you do that before baby arrives.
The diapers above are what we are still using. 21 diapers total. I have to do a diaper load of laundry every other day. Add more diapers to your collection if you don't want to do the diaper load as frequently.
Here's what it's like to actually use the diapers:
Prefolds with covers: If you use them like I did, you'll only be in these for the first few weeks. If your baby is exclusively breastfed, the poo is entirely water soluble, so you just put the cloth prefold into the laundry (poo can go into washing machine too) and if the cover did not encounter poo, use it again with a fresh prefold. I only washed the covers if they encountered direct poo or if it had been a couple days since washing them. If they are soaked in pee, you can just hang to dry and use it the next diaper change. If your baby is formula fed, the poo will need to go down the toilet or in the trash, and i'll get into that a little more in a second. There are many ways to fold the prefold onto baby. I used the jellyroll. It'll take a couple of times actually using them to know what roll is best for your baby. Practice on a teddy bear before baby arrives!
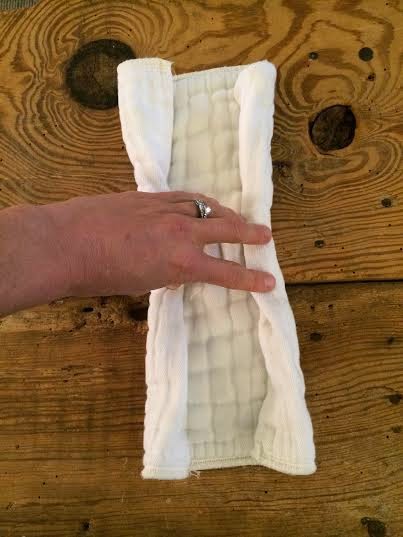 |
| jelly roll |
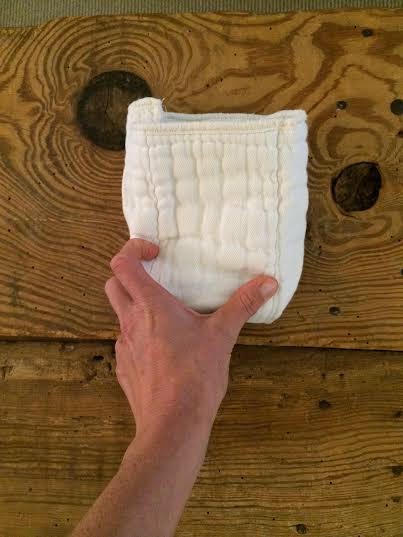 |
| jelly roll |
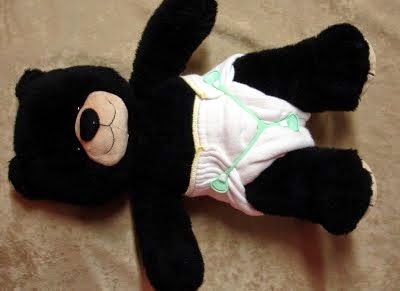 |
| jellyroll on bear with Snappi (the Thirsties cover goes over all of this) |
Pocket Diapers: If your baby is exclusively breastfed, you'll just take the diaper off baby, pull out the insert and drop both into laundry pail. BumGenius diapers come with two inserts: newborn and the main insert. We used only the newborn insert for about a month, then switched to two newborn inserts in one diaper (double stuffing) for about a month and then switched to the main insert. The main insert is longer, thicker, and has snaps so the sizing can adjust as your baby grows, but it was a little bulky for Owen for the first couple months. We have always had to change his diaper every two hours to prevent a leak. Even now, still changing every two hours (he's 14 months old). This is because cloth diapers are...cloth. They are not made out of the nasty super-absorbent stuff that's inside disposable diapers, so they do have a leaking point.
When poops get real, you can't just drop everything in the laundry pail. This is the case for formula fed babies or when your baby starts eating solid foods. When this happened, I purchased Eco Liners. I lay the liner inside the diaper before putting it on Owen. When he has a poop, I just pick up the liner and up comes all the poop with it, and that goes into the trash while the insert and diaper go into the laundry pail. If you don't use liners, you'll have to use a poo-spatula type thing to get the poo out of the diaper or have a water spray hook up on your toilet....or pick the poo out of the diaper with a wipe or something... Liners are fabulous!!
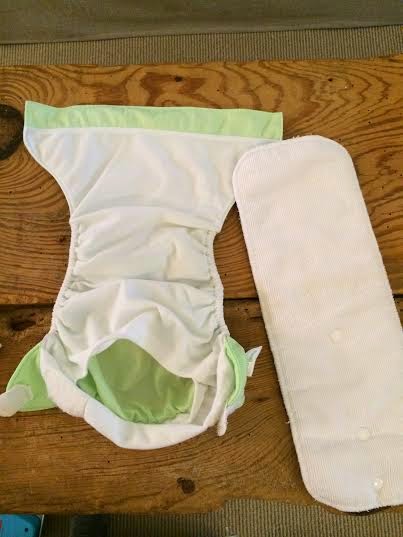 |
| pocket diaper and main insert (un-stuffed) |
 |
| a roll of liners |
Washing the diapers
I have a total of 21 diapers which means I have to wash them every other day. When it's time to wash, I turn the washable diaper liner inside out over the washing machine and throw it all in (liner included). I wash on hot and do a double rinse cycle. I have not needed to soak the diapers before doing the wash cycle like other moms do...perhaps because of the liners?!! My diapers always come out clean! I do use a soap that is made for cloth diapers. I use Rockin' Green detergent. I tried using free and clear All detergent, but the buildup made the diapers less absorbent, and they didn't come out as clean. Every month or so, the diapers will get an ammonia odor to them. When that happens, throw a couple tablespoons of bleach in with the wash load. That'll take care of it. If you are using any velcro diapers (the hook and loop BumGenius), hang those to dry to prolong life, but dry the rest in the dryer without a dryer sheet. Dryer sheets make them less absorbent. Do not dry the pail liner either because it'll get warped/melted (learned that the hard way).
When Owen turned 1, he started wetting more during the night. I was double/triple stuffing his diapers for a while, but sometimes I'd still have to change him around 4am. I started using disposables at night recently. They are nasty but they allow him to sleep through the night a little easier. You'll get to know your child's wetting pattern and make decisions that fit the best.
Hope this helps! Leave me a comment if you have any questions!


